M
First of all I must say this is the first time I have ripped a BRAND new sled down for any type of painting, I was pretty skeptical of this, I still am as its not back together yet, just into pieces and ready to send off to the local shop for coating. This is pretty much my thoughts on doing this for the first time, and some things I found as a noob to this, as well as a few questions for the seasoned pros at this.
Overall, its an easy job, just takes some time if you don't want to massacre your brand new toy. If it turns out the way I am hoping, I would not be afraid to do this to every new sled I buy, especially if things come apart like they do on the Pro.
Here is the tool list I used:
-1 set of metric sockets, 8mm-20mm, 10mm was the smallest and I think 18 was the largest I actually used
1- corresponding rachet wrench set
1- battery powered impact (just to ease along some bolts) - not really required
1 - die grinder and bit
1 - drill and 9/64 bit (used in drilling rivet heads)
1 - small punch
1 - hammer
1 - set torque bits (hood and slider removal)
1 - hex screw set (Alan keys) - only one really needed for removing ball joints from spindle assembly
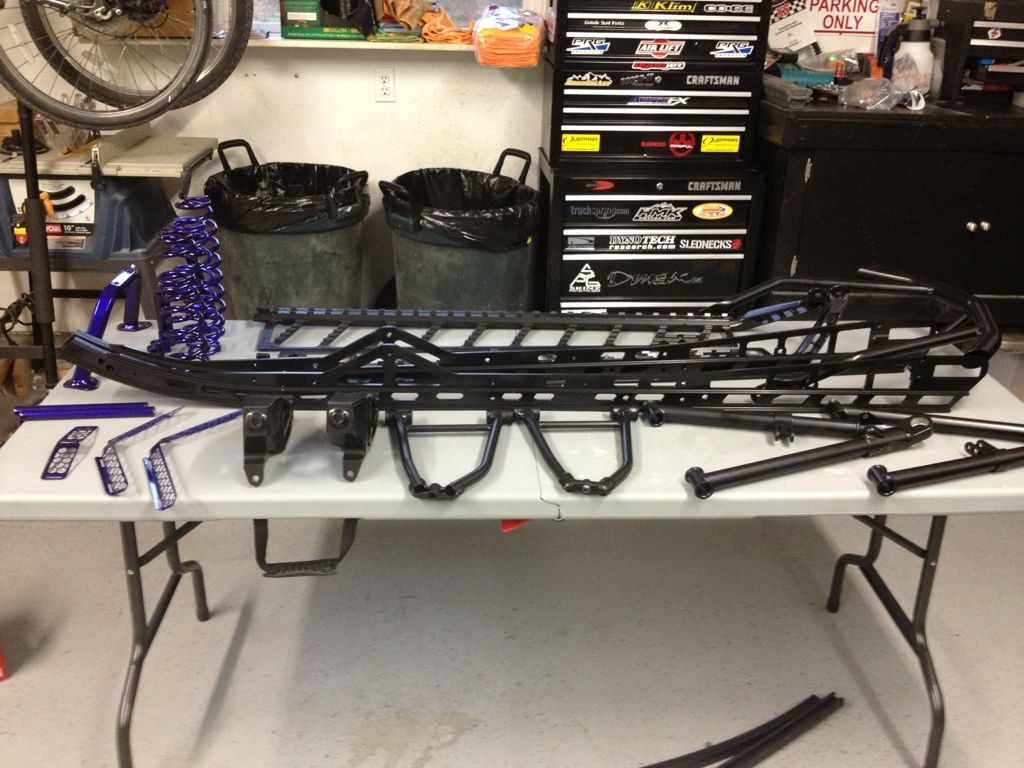
This is the list of parts I removed for coating:
-1 front bumper
-2 spindles
-2 upper A arms
-2 lower A arms
-1 seat bracket
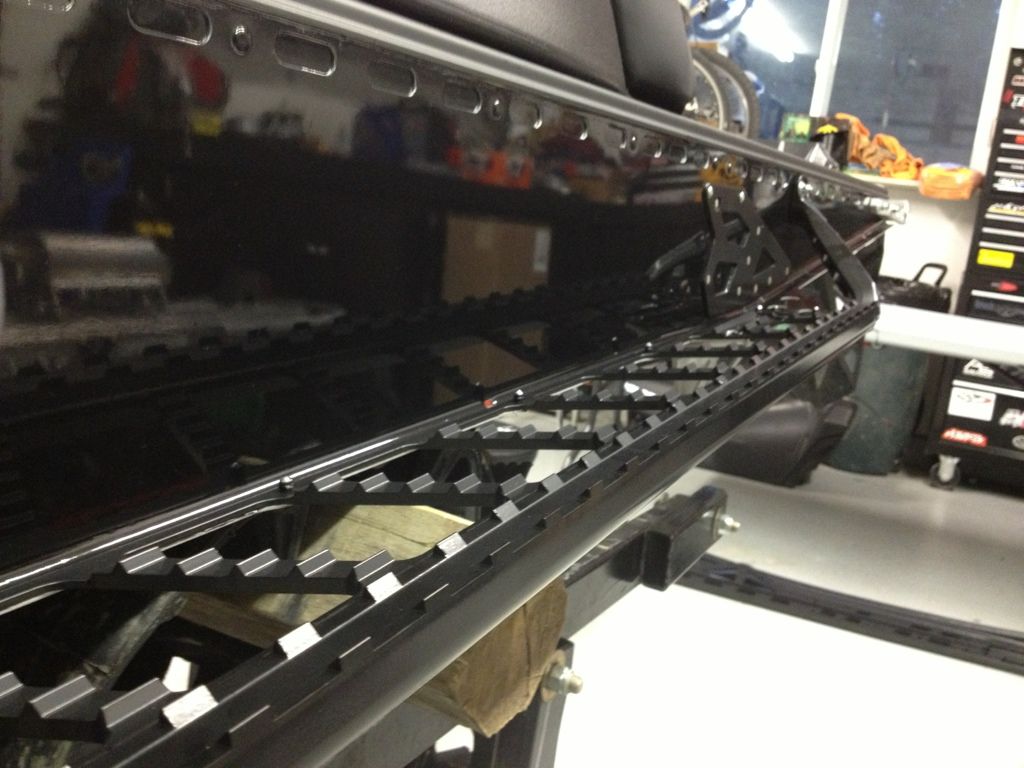
-2 suspension rails
also to be included is my gas rack which is not currently attached anyway so it never had to be removed
Parts I thought about including were:
-Rear bumper mounts, decided against this just because I know I will break a set or 2 at some point in the season and thus would be a waste to coat them
- 2 steering control arms, decided I didn't want to deal with realigning ski stance or removing the boots and all that crap to get them off, so they are staying in aluminum finish
Now here is the the breakdown of everything keeping in mind the hood and side panels are already removed
Front bumper:
Drill out the 2 rivets holding the bumper to the nose cone, remove the 3 10mm bolts holding bumper to frame tabs and lower nose cone. Remove bumper, drill out 2 bolts holding plastic side covers to bumper and clean out first to rivets if required. You man find it easier to remove the exhaust depending on what you are using for a drill, I didn't have to
Seat Mount:
Undo 10mm nuts x 4. Remove. That is all
Now at this point I looked at things and decided it was going to be easier to remove the rear skid before tearing out the front suspension. Reason being I didn't have access to the lift, it was burried behind and tractor that wasn't running. So I basically wanted to be able to turn the sled from one side to the other if needed and to be able to pull the suspension out while the machine was on its side.
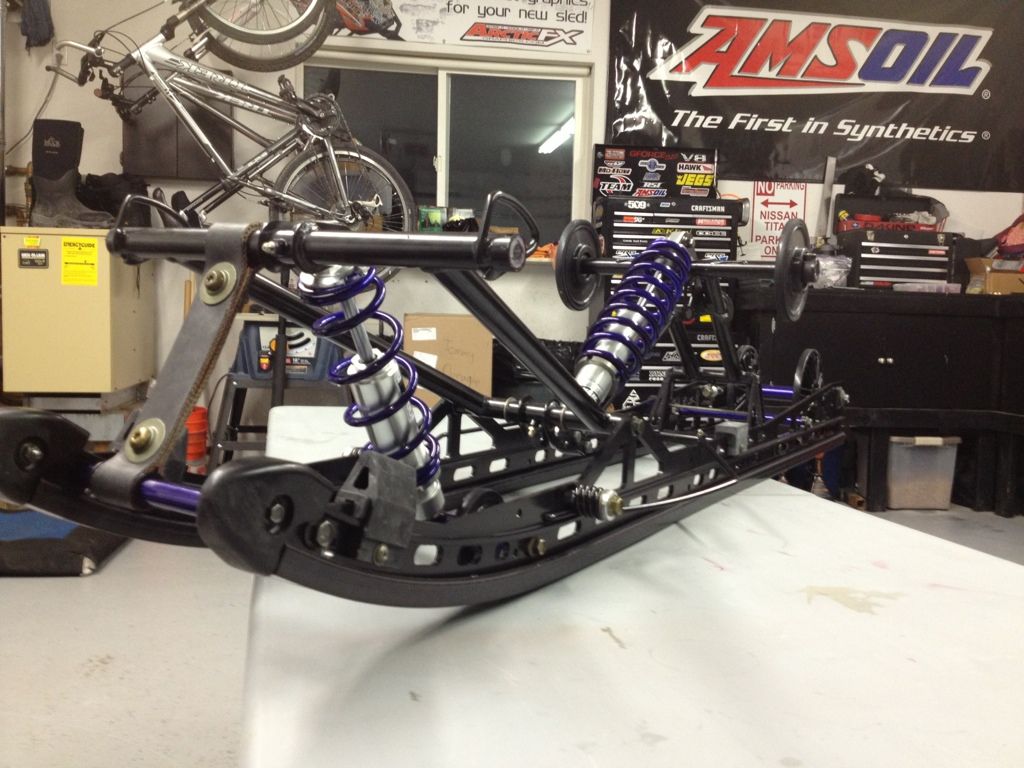
Rear skid:
- undo bolt in center of rear axle as to allow axle to slide and thus track tension to decrease
- undo jam nut on track tensioner
- undo track tensioner bolts, I removed mine completely at this stage as they need to come out at some point anyway
-loosen rear track shock spring as to allow suspension to collapse as needed
-remove suspension mounting bolts x 4
-turn sled on side and remove skid
-return sled to flat position
Front Suspension
If I was doing this again, the biggest change I would make to what I did would be to loosen all bolts needed to separate various parts before removing things completely from the sled. Its a real pain to undo some of the bolts in the ski/spindle assemblies on a bench if they have not at least been cracked lose.
so no:
-remove connecting bolts from sway bar
- remove bolts from shocks (I just did the lower bolts and left uppers attacked to bulkhead
-undo 12mm nuts that attach A arms x 14
-remove front bolt from A arm (this bolt goes right through the bulkhead and is common to both halves of the sled)
you should now be ready to remove the whole ski and A arm assembly, I chose to work on the whole assembly on the bench to simplify things in my eyes.
next I undid the nuts on the upper ball joint, being careful to disturb the jam nut as little as possible so I don't have to piss around with ski stance adjustments on reassembly.
-once this is out you will have the upper A Arm free, now remove the "mount" bars and bushings from the arm and you are ready for coating prep on this arm
Now undo the bold holding the ball joint in the lower Arm, this will separate it from the spindle.
-remove the snap ring holding the ball joint into the arm, and remove ball joint from arm, I used a press to carefully press it out, A hammer and socket in combination with a vise will also do
- remove the "mount bars" and bushings from the other end of the lower arm, and it is now ready for coating prep
Now to separate spindle from ski.
-Undo the bolt running through the ski and spindle. Remove bolt and separate spindle and ski, being careful of the multitude of spacers and bushings in here.
-remove center bushing from spindle/ski mount hole
-remove inner plastic bushings from same hole (I started another thread about getting these out, I found no way to save all 4 of these, and ended up wrecking one half and using a socket to punch out the second half, others have opted to leave these in for coating)
spindle is now ready for prep
Rear skid tear down, there is alot here and I really don't want to type it all out, basically just keep stripping bars out that hold the 2 rails together, and note locations of washers and bushings on all sides ob attachment bars. I would take something off and reassemble the bolts and bushings in order they came off as soon as I removed desired part. Basically just keep in mind there are a ton of spacer washers and bushings here, and if you dont keep things in order, you will be confused when you reassemble.
basically what all has to be taken apart and removed:
-rear axle assembly
-any cross bars
-bar that hold rear shock to rails
-bar that holds front shock to rails
-bar that holds front limiter
-rubber travel limiter stops
-plastic anti stab covers at front of rails
-screws that hold on sliders
-sliders
when done you should be basically left with 2 naked rails and a suspension assembly and some parts, lol.
keep in mind you do not have to strip everything right down, just take bolts off that need to be removed to separate the 2 rails. All the shock and suspension arms can basically stay in tact
Overall, its an easy job, just takes some time if you don't want to massacre your brand new toy. If it turns out the way I am hoping, I would not be afraid to do this to every new sled I buy, especially if things come apart like they do on the Pro.
Here is the tool list I used:
-1 set of metric sockets, 8mm-20mm, 10mm was the smallest and I think 18 was the largest I actually used
1- corresponding rachet wrench set
1- battery powered impact (just to ease along some bolts) - not really required
1 - die grinder and bit
1 - drill and 9/64 bit (used in drilling rivet heads)
1 - small punch
1 - hammer
1 - set torque bits (hood and slider removal)
1 - hex screw set (Alan keys) - only one really needed for removing ball joints from spindle assembly
This is the list of parts I removed for coating:
-1 front bumper
-2 spindles
-2 upper A arms
-2 lower A arms
-1 seat bracket
-2 suspension rails
also to be included is my gas rack which is not currently attached anyway so it never had to be removed
Parts I thought about including were:
-Rear bumper mounts, decided against this just because I know I will break a set or 2 at some point in the season and thus would be a waste to coat them
- 2 steering control arms, decided I didn't want to deal with realigning ski stance or removing the boots and all that crap to get them off, so they are staying in aluminum finish
Now here is the the breakdown of everything keeping in mind the hood and side panels are already removed
Front bumper:
Drill out the 2 rivets holding the bumper to the nose cone, remove the 3 10mm bolts holding bumper to frame tabs and lower nose cone. Remove bumper, drill out 2 bolts holding plastic side covers to bumper and clean out first to rivets if required. You man find it easier to remove the exhaust depending on what you are using for a drill, I didn't have to
Seat Mount:
Undo 10mm nuts x 4. Remove. That is all
Now at this point I looked at things and decided it was going to be easier to remove the rear skid before tearing out the front suspension. Reason being I didn't have access to the lift, it was burried behind and tractor that wasn't running. So I basically wanted to be able to turn the sled from one side to the other if needed and to be able to pull the suspension out while the machine was on its side.
Rear skid:
- undo bolt in center of rear axle as to allow axle to slide and thus track tension to decrease
- undo jam nut on track tensioner
- undo track tensioner bolts, I removed mine completely at this stage as they need to come out at some point anyway
-loosen rear track shock spring as to allow suspension to collapse as needed
-remove suspension mounting bolts x 4
-turn sled on side and remove skid
-return sled to flat position
Front Suspension
If I was doing this again, the biggest change I would make to what I did would be to loosen all bolts needed to separate various parts before removing things completely from the sled. Its a real pain to undo some of the bolts in the ski/spindle assemblies on a bench if they have not at least been cracked lose.
so no:
-remove connecting bolts from sway bar
- remove bolts from shocks (I just did the lower bolts and left uppers attacked to bulkhead
-undo 12mm nuts that attach A arms x 14
-remove front bolt from A arm (this bolt goes right through the bulkhead and is common to both halves of the sled)
you should now be ready to remove the whole ski and A arm assembly, I chose to work on the whole assembly on the bench to simplify things in my eyes.
next I undid the nuts on the upper ball joint, being careful to disturb the jam nut as little as possible so I don't have to piss around with ski stance adjustments on reassembly.
-once this is out you will have the upper A Arm free, now remove the "mount" bars and bushings from the arm and you are ready for coating prep on this arm
Now undo the bold holding the ball joint in the lower Arm, this will separate it from the spindle.
-remove the snap ring holding the ball joint into the arm, and remove ball joint from arm, I used a press to carefully press it out, A hammer and socket in combination with a vise will also do
- remove the "mount bars" and bushings from the other end of the lower arm, and it is now ready for coating prep
Now to separate spindle from ski.
-Undo the bolt running through the ski and spindle. Remove bolt and separate spindle and ski, being careful of the multitude of spacers and bushings in here.
-remove center bushing from spindle/ski mount hole
-remove inner plastic bushings from same hole (I started another thread about getting these out, I found no way to save all 4 of these, and ended up wrecking one half and using a socket to punch out the second half, others have opted to leave these in for coating)
spindle is now ready for prep
Rear skid tear down, there is alot here and I really don't want to type it all out, basically just keep stripping bars out that hold the 2 rails together, and note locations of washers and bushings on all sides ob attachment bars. I would take something off and reassemble the bolts and bushings in order they came off as soon as I removed desired part. Basically just keep in mind there are a ton of spacer washers and bushings here, and if you dont keep things in order, you will be confused when you reassemble.
basically what all has to be taken apart and removed:
-rear axle assembly
-any cross bars
-bar that hold rear shock to rails
-bar that holds front shock to rails
-bar that holds front limiter
-rubber travel limiter stops
-plastic anti stab covers at front of rails
-screws that hold on sliders
-sliders
when done you should be basically left with 2 naked rails and a suspension assembly and some parts, lol.
keep in mind you do not have to strip everything right down, just take bolts off that need to be removed to separate the 2 rails. All the shock and suspension arms can basically stay in tact