• Don't miss out on all the fun! Register on our forums to post and have added features! Membership levels include a FREE membership tier.

nytro mtx, getting some head(er)

ruffryder

Well-known member
Lifetime Membership
Aug 14, 2002
8,468
1,258
113
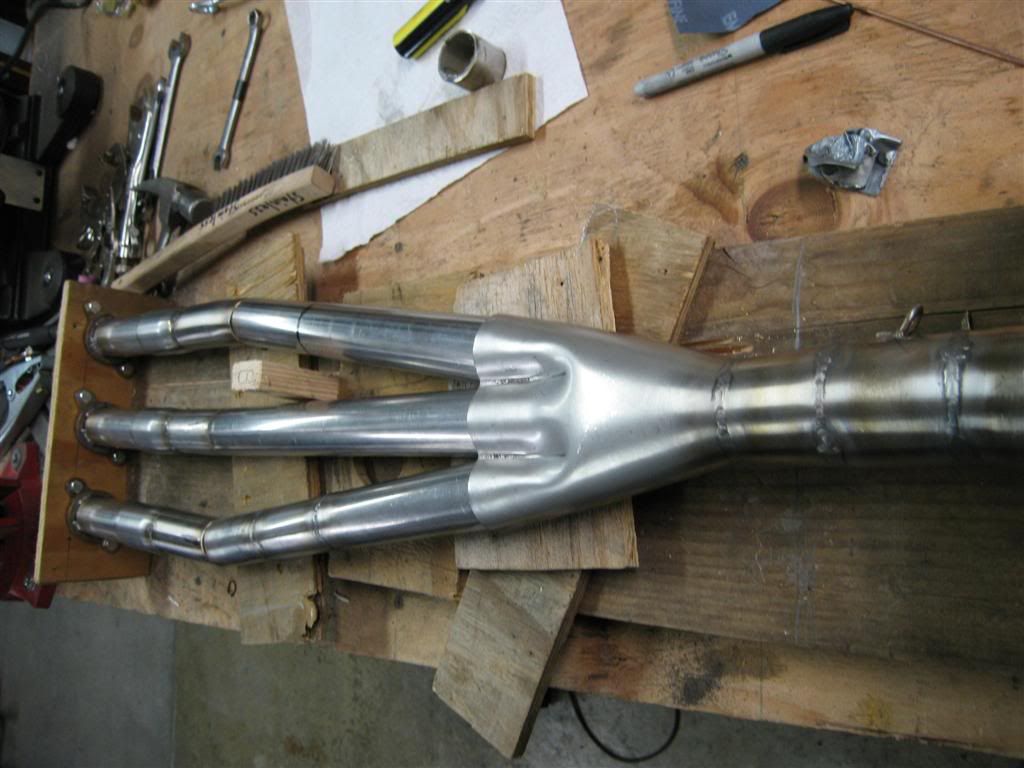
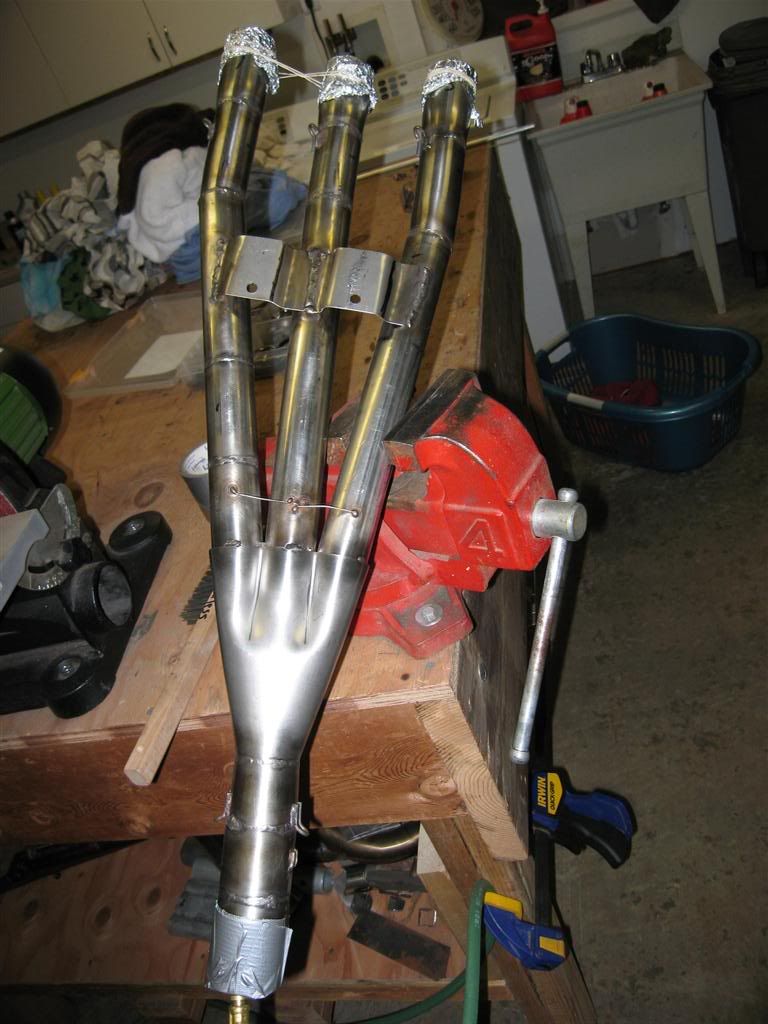
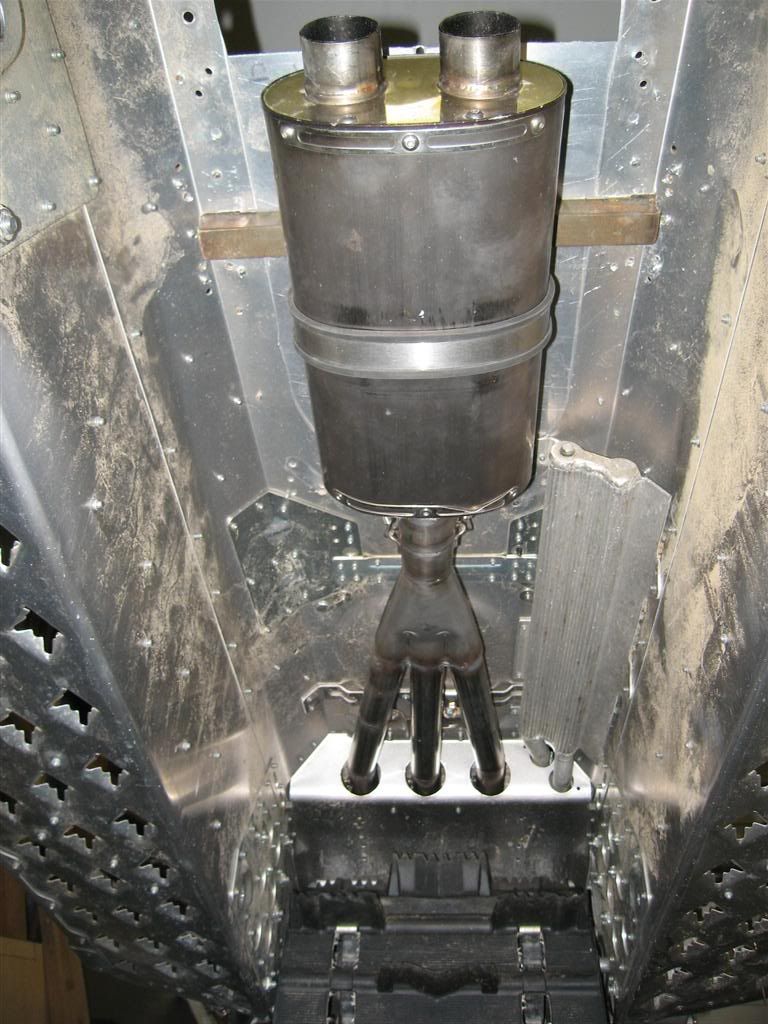
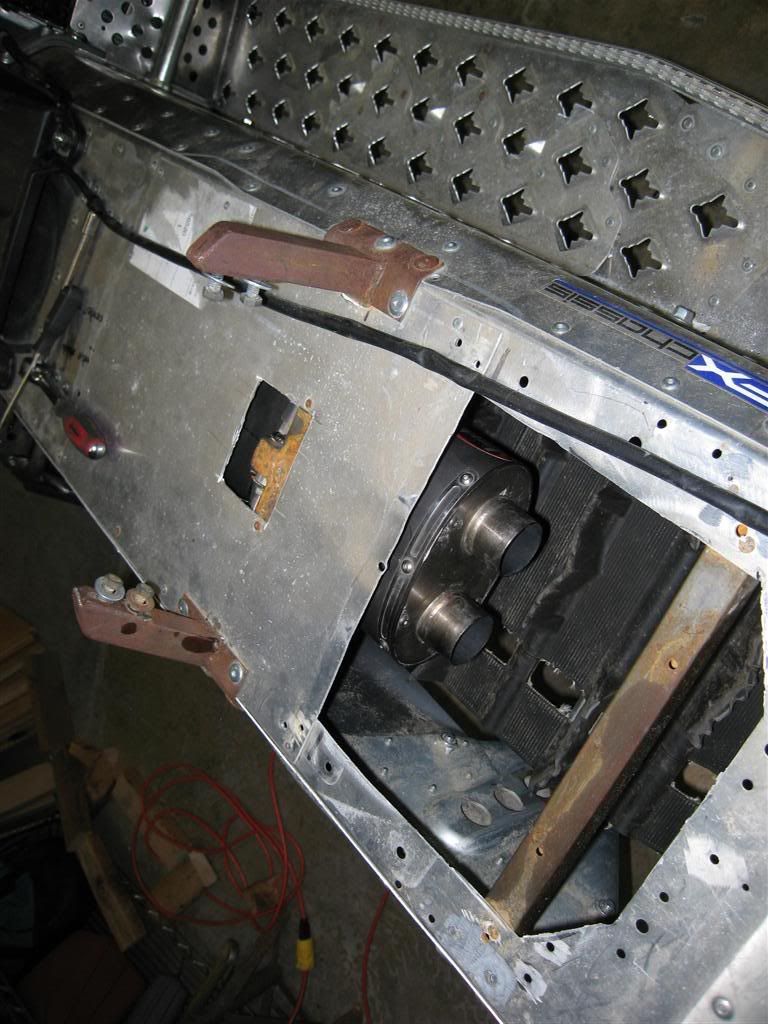
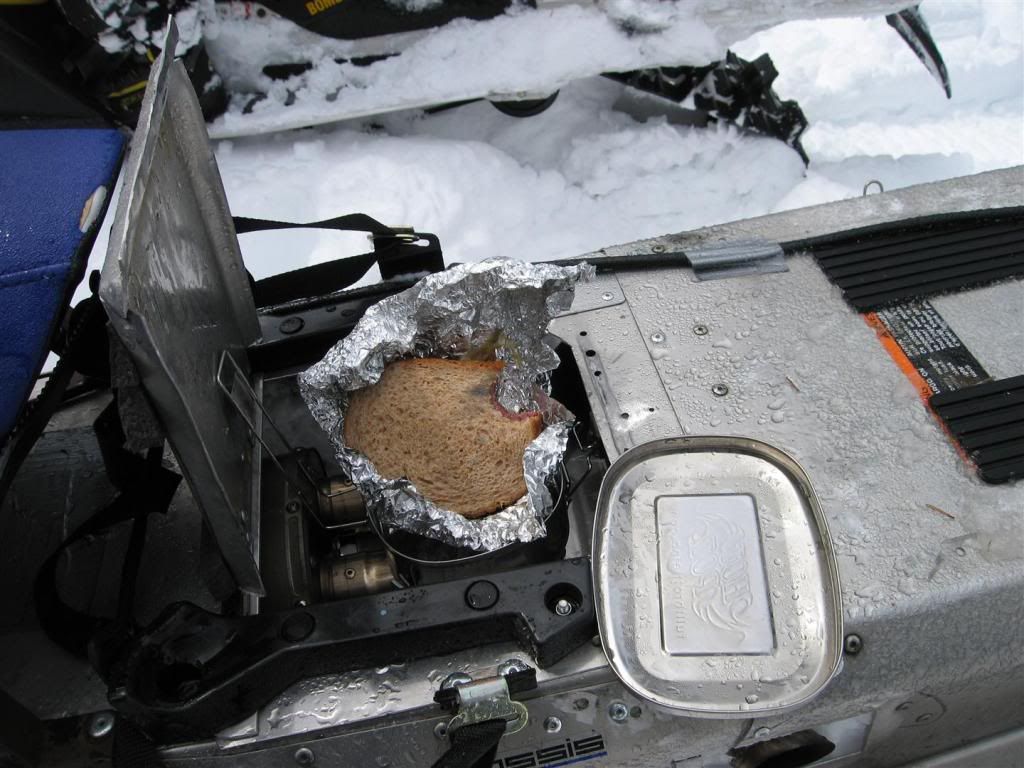
Last year, I cut up my stock header to mount my jardine muffler under the tunnel. It was quite a hack job, so I decided to build my own header, from the head back.

Pics to come soon.

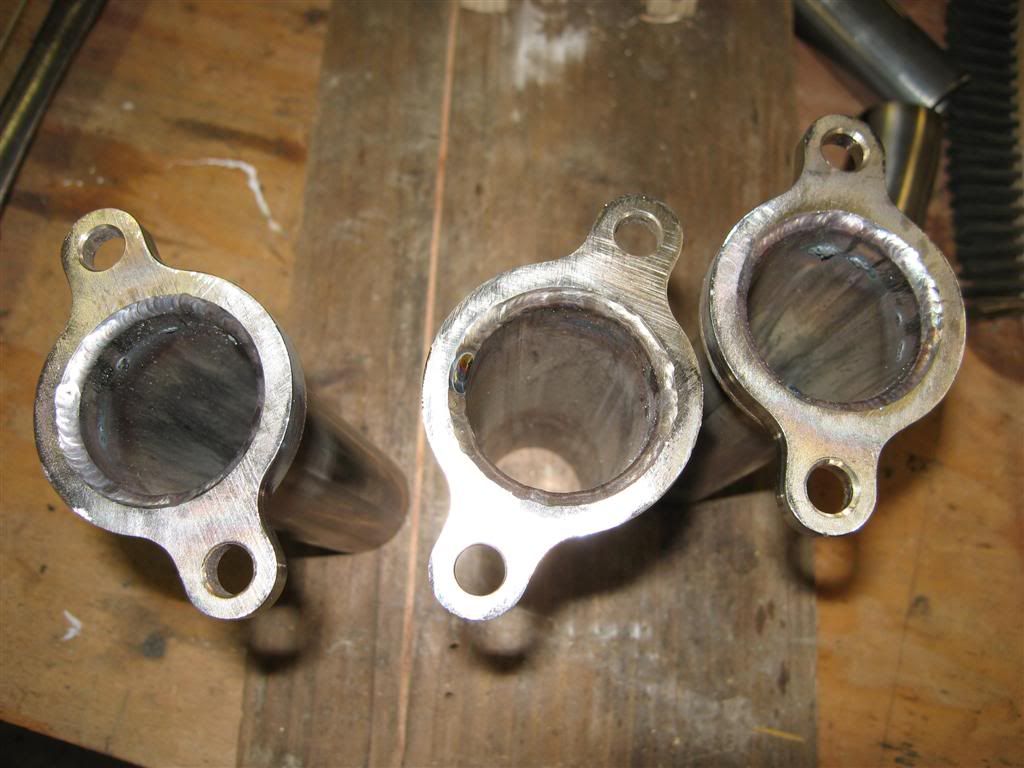
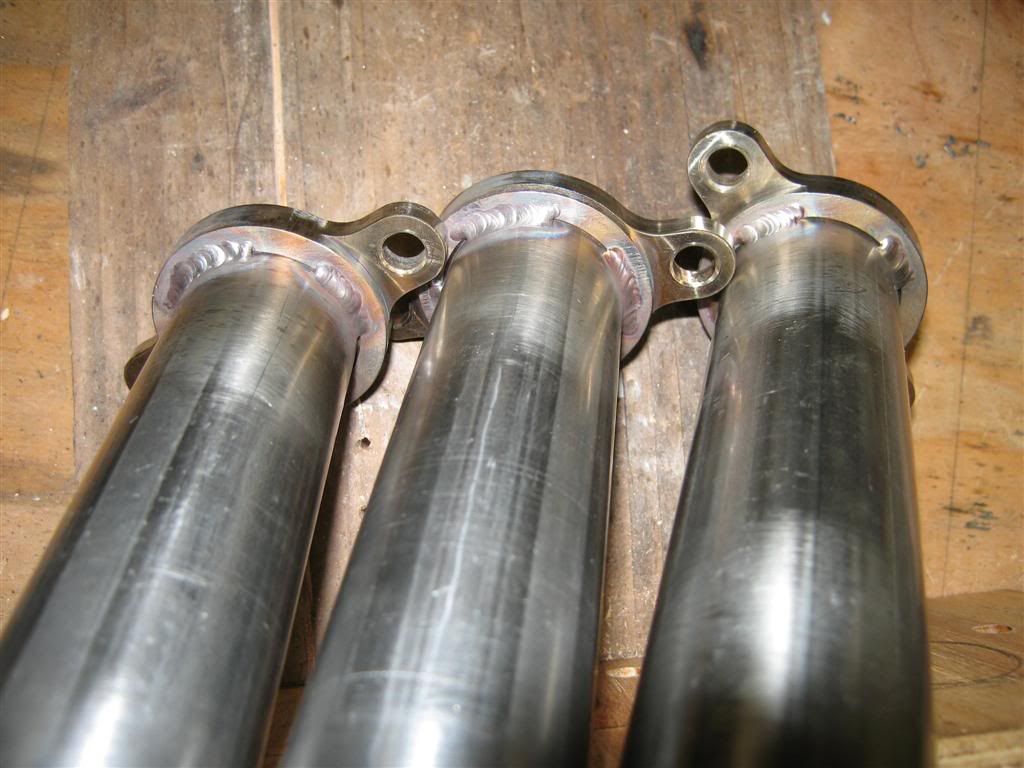
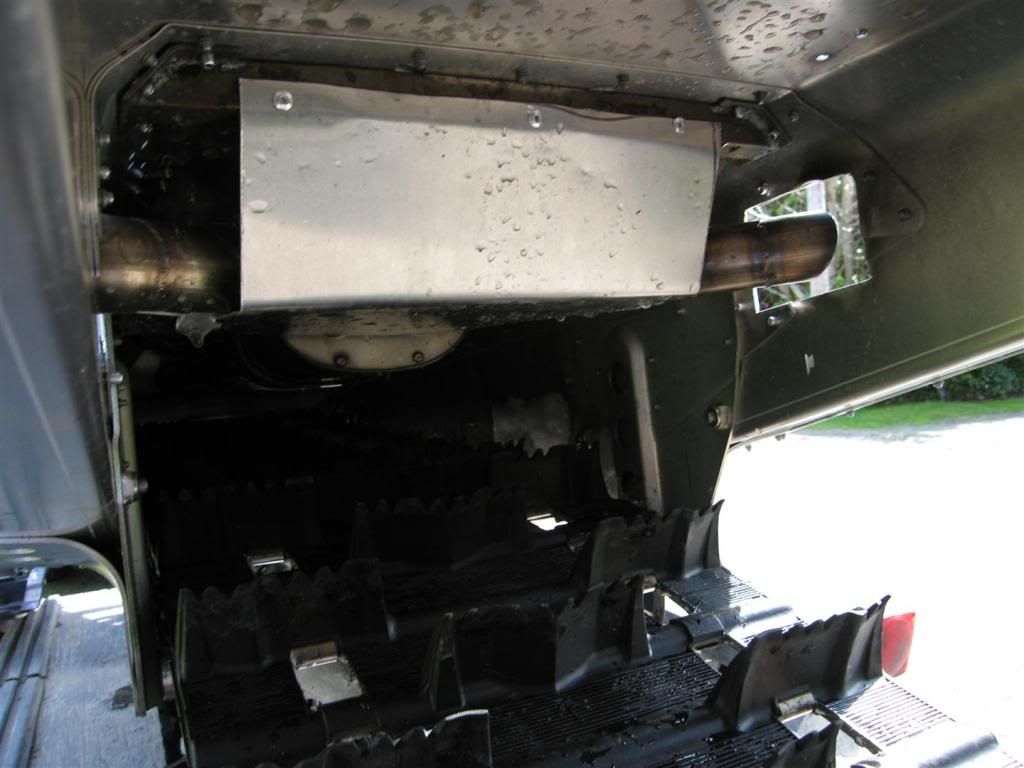
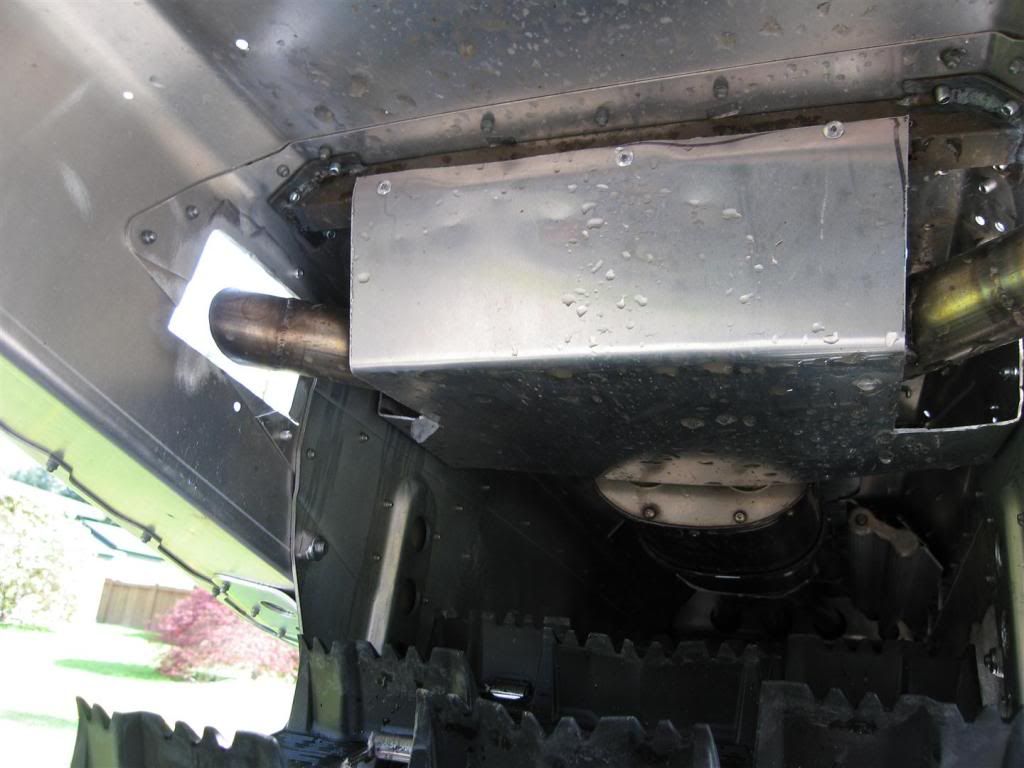
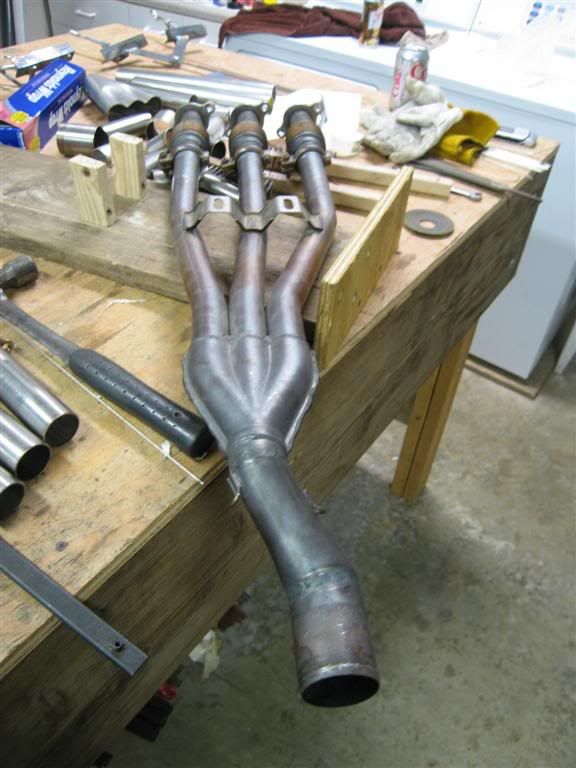
Stock header modification
IMG_4572.jpg


complete stock header
IMG_4574.jpg


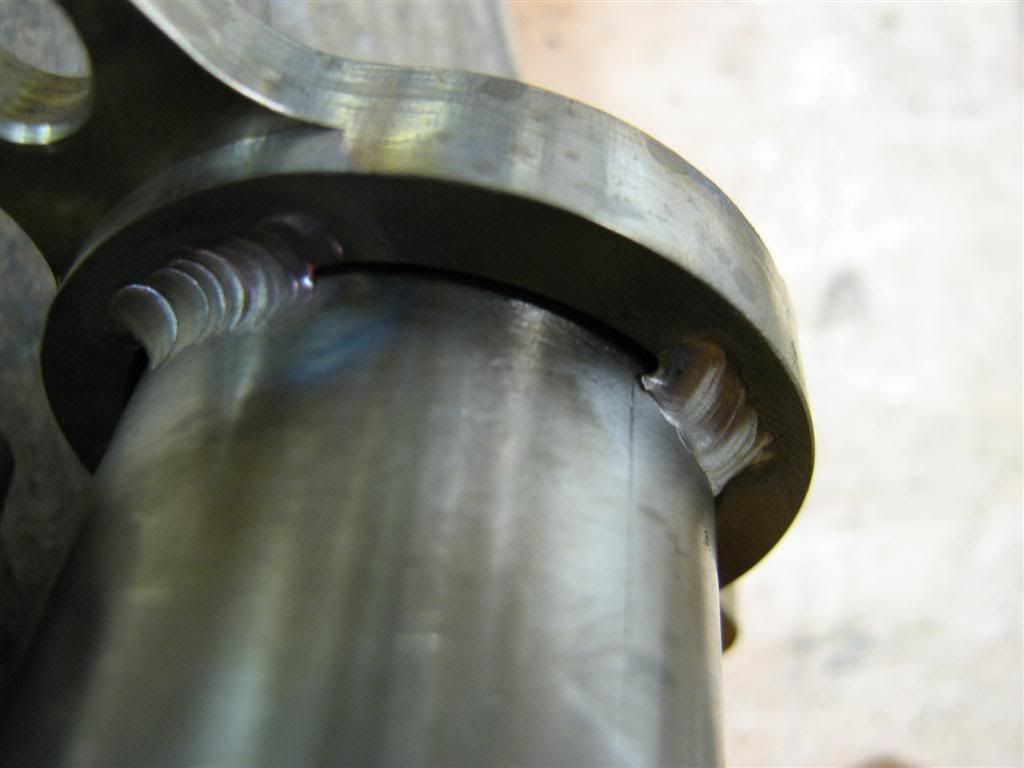
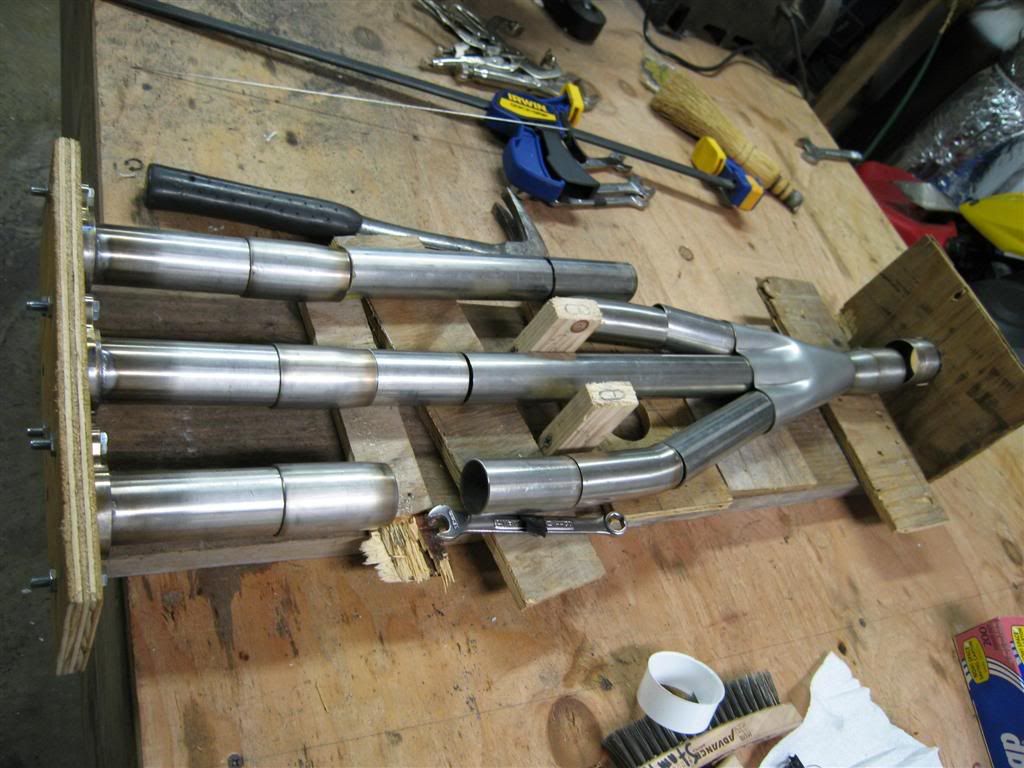
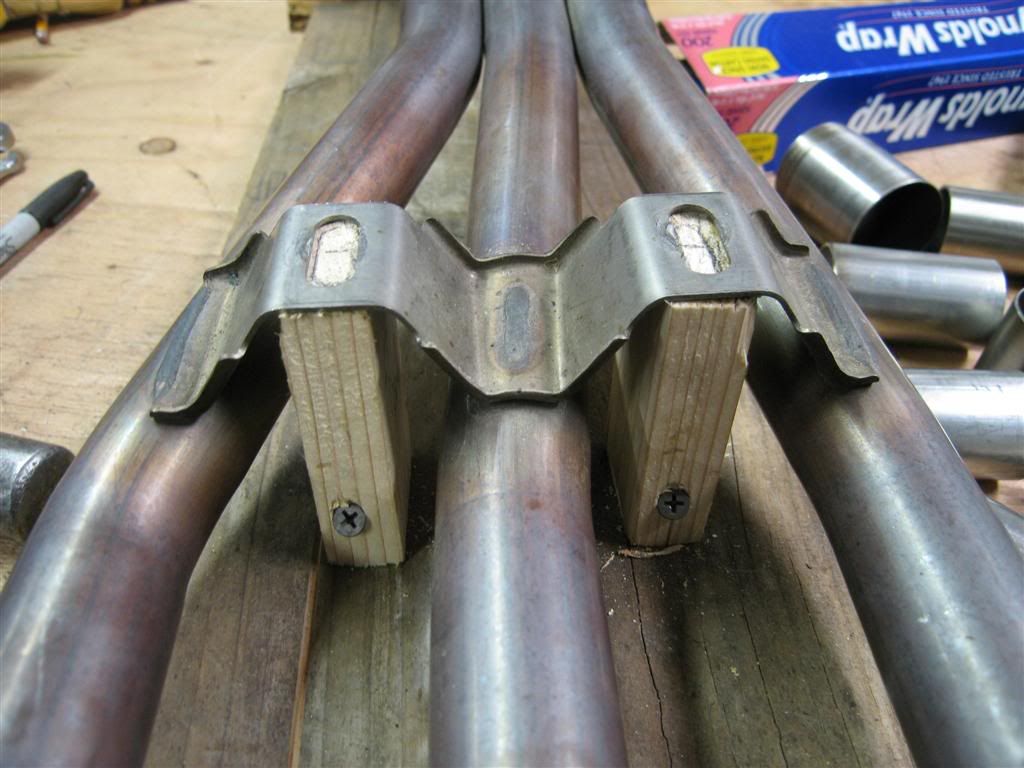
I decided the best way to do this was to make a jig for the stock header. That way I can just connect the points and it should be relatively close.
IMG_4575.jpg


I am even gonna try and get the mounts done the same way too... cough.. try... cough...
IMG_4577.jpg


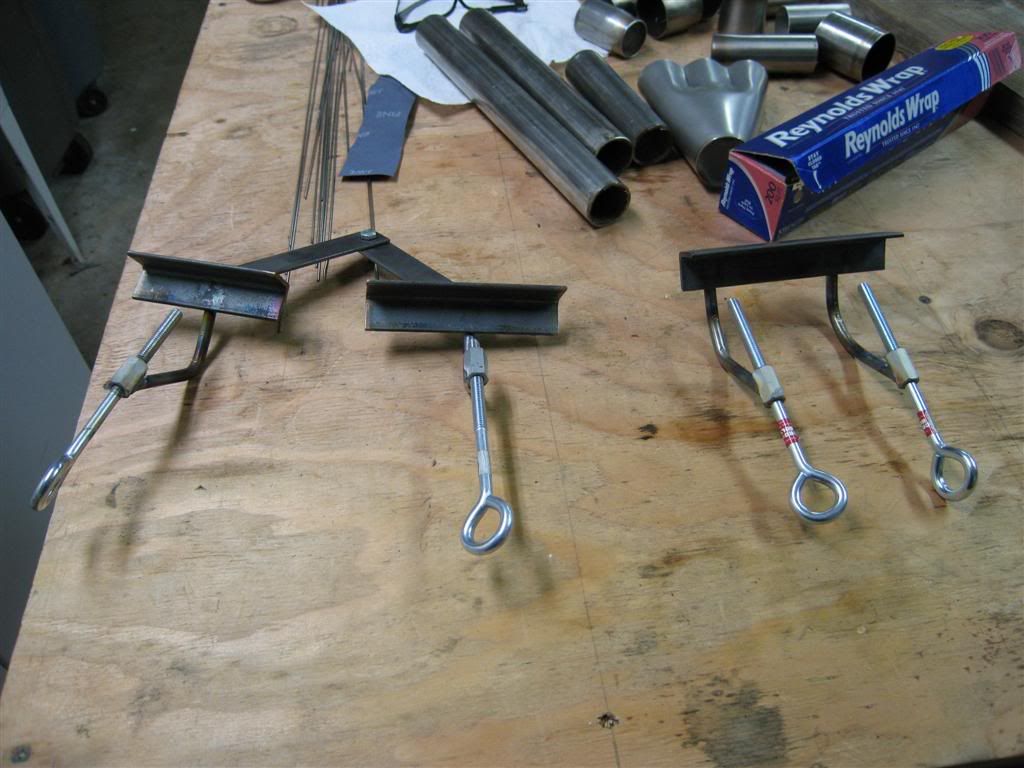
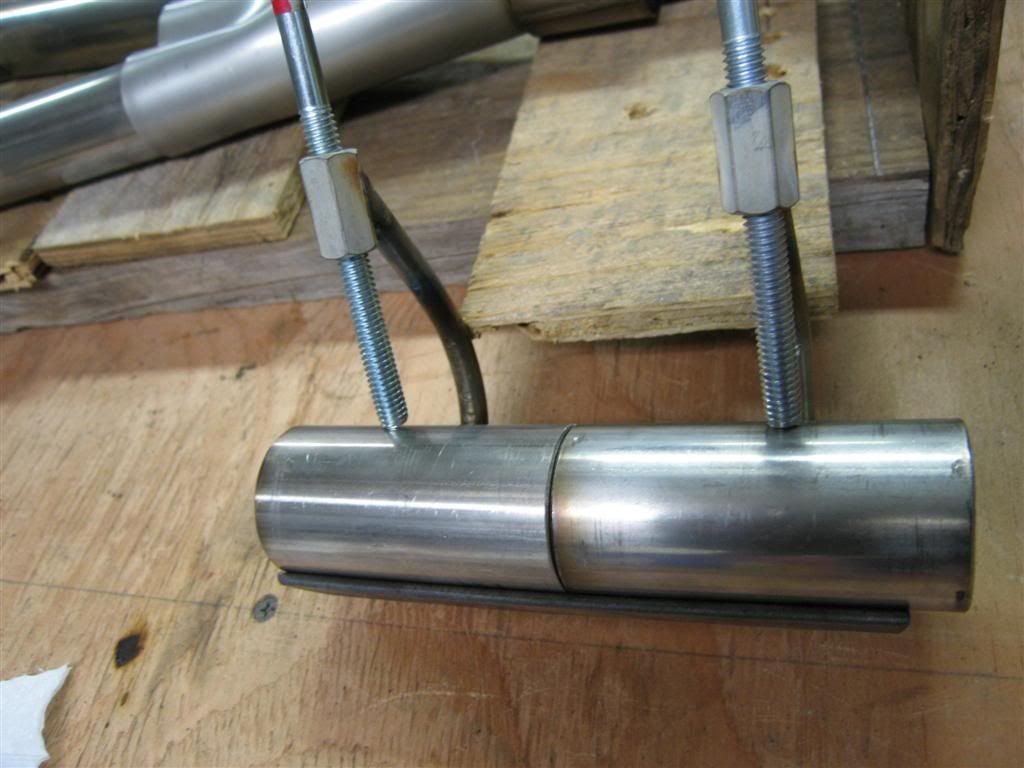
Before I could even get started, I needed to make some tools, as much as I already am one. ha ah
IMG_4570.jpg


they work great when the wifey can't make it out at night to hold a piece of pipe for you when you are welding...
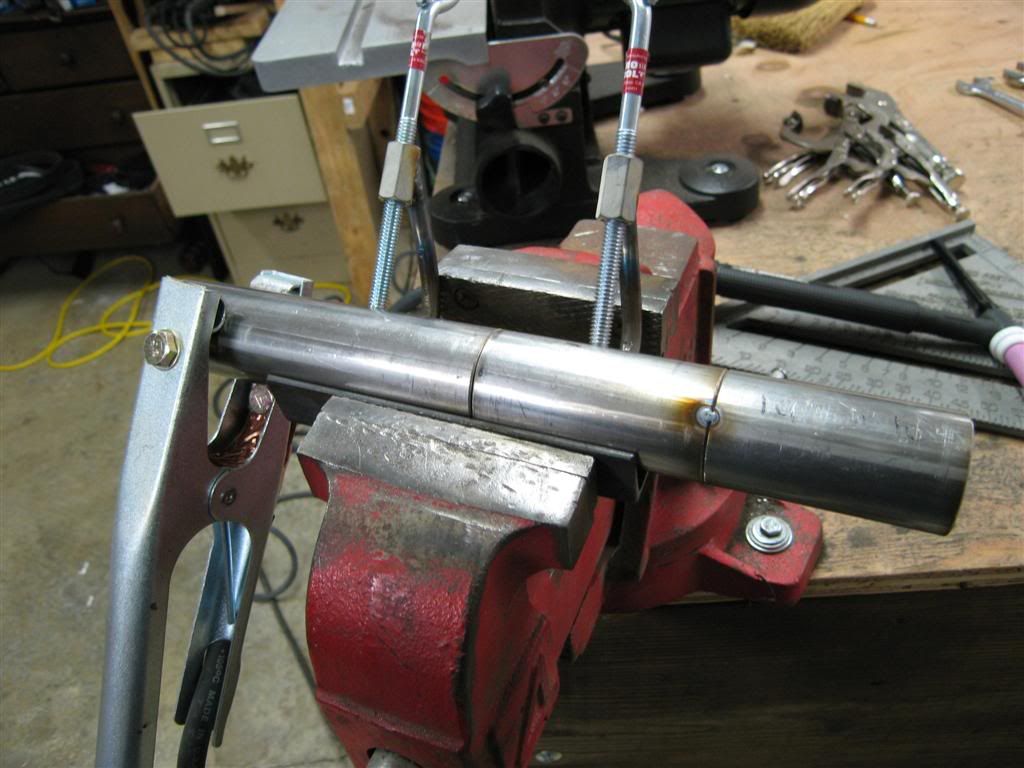
IMG_4593.jpg
another
IMG_4596.jpg


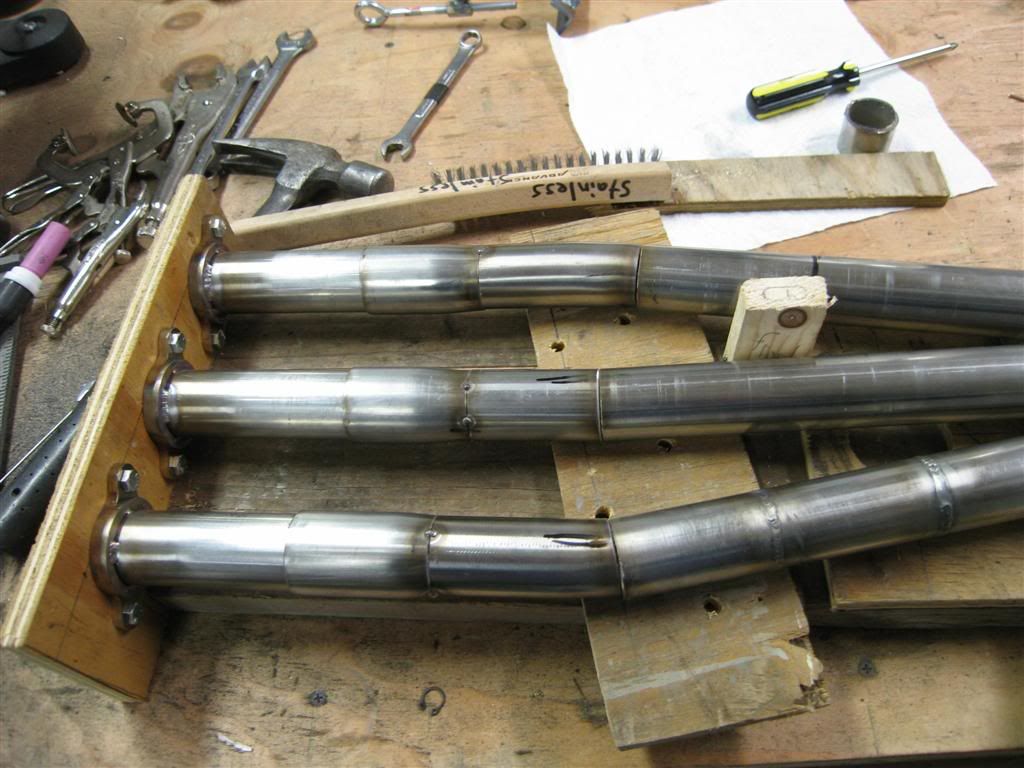
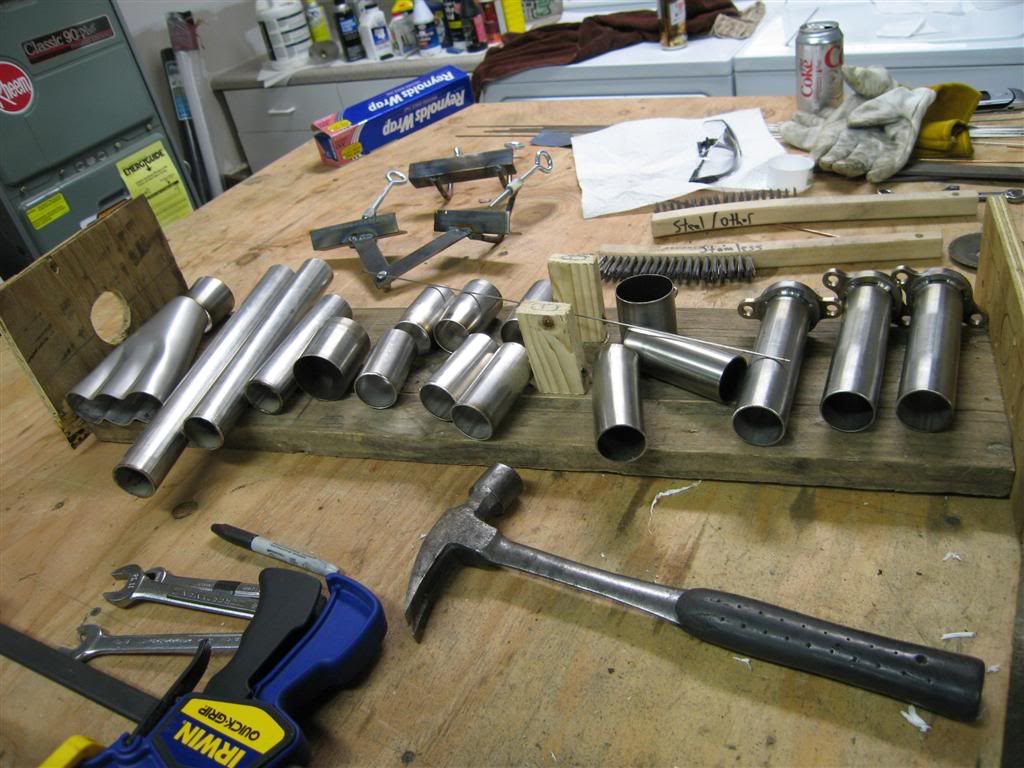
I have been in the process of buying some fab tools also.. Check out the hf disc sander. It actually is pretty dang good. I need to get better discs for it, as the hf ones don't last very long when I am leaning into it with stainless tube. I can get the thing to stall, but with my heft, er muscle, I think I could get most things to stall. It was only 100 new too. Those dang wilton ones are a lot more.
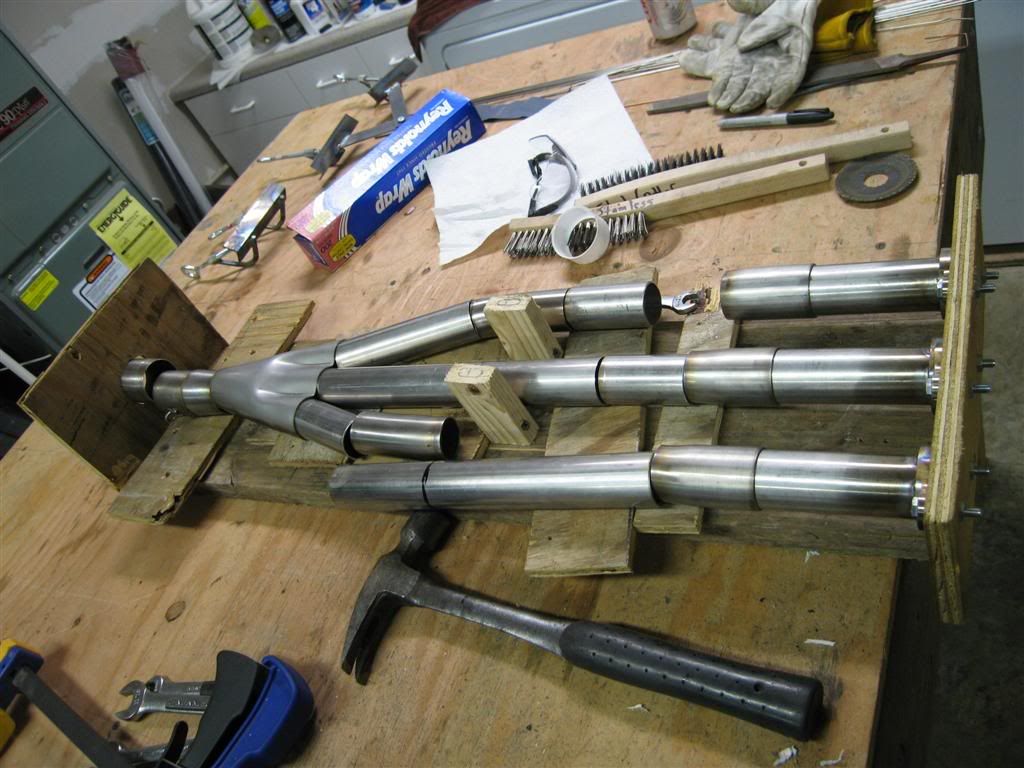
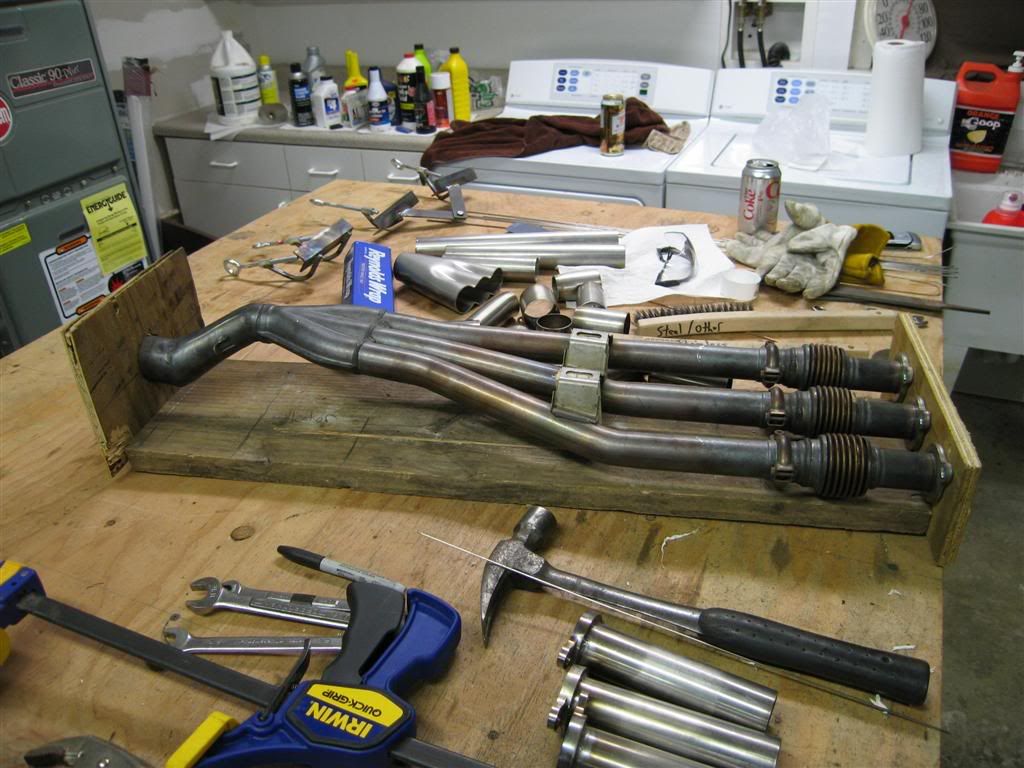
Tools being used
IMG_4568.jpg


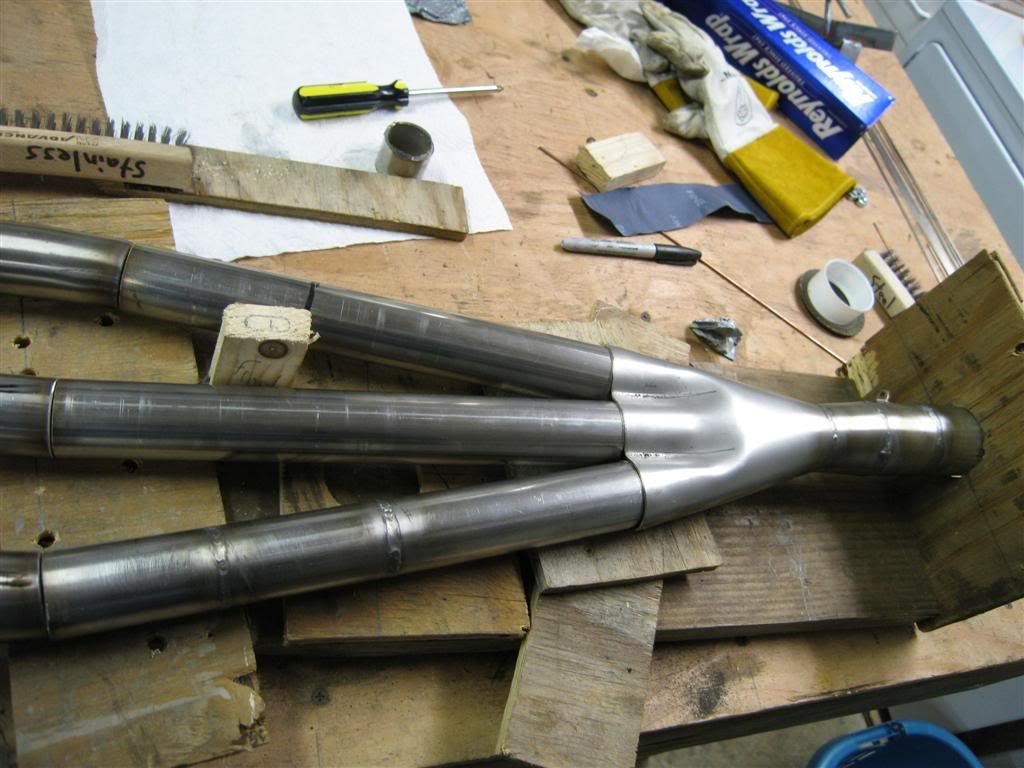
What is missing from the picture is my disc grinder. That is what I am using to cut the tube. :rolleyes: I cut a 2" strip of stainless sheet, about a foot long and I went through one of those blades when I got to the bottom. :eek: It was a *little* smokey in the shop... ha ha I need a band saw...:face-icon-small-dis

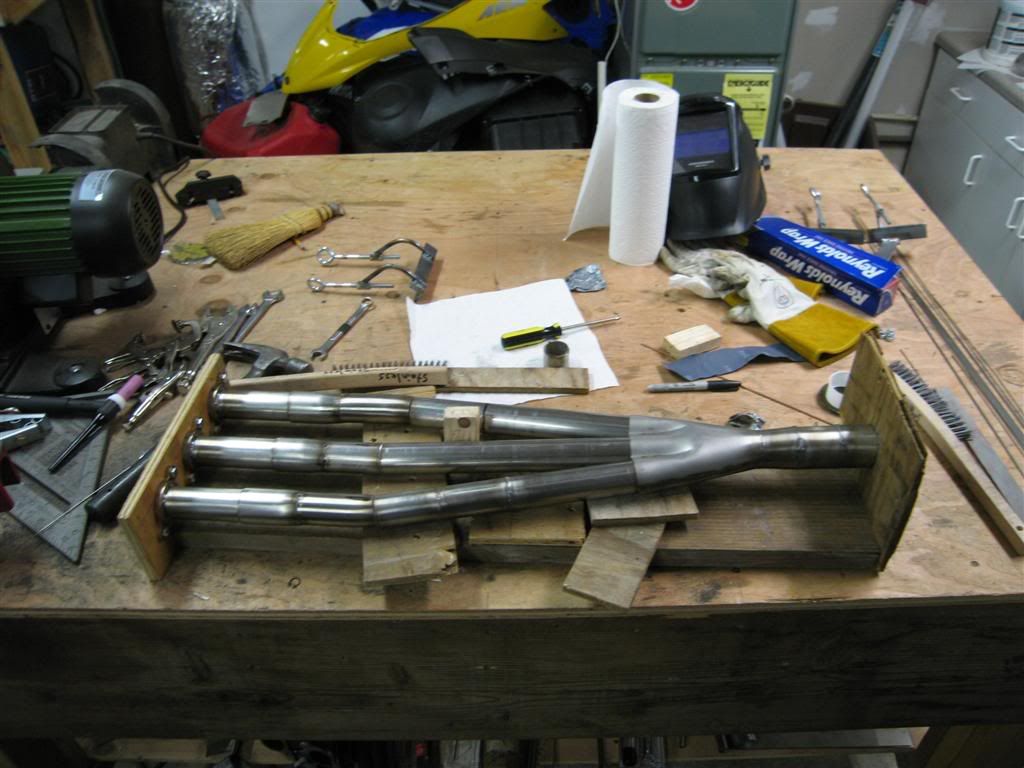
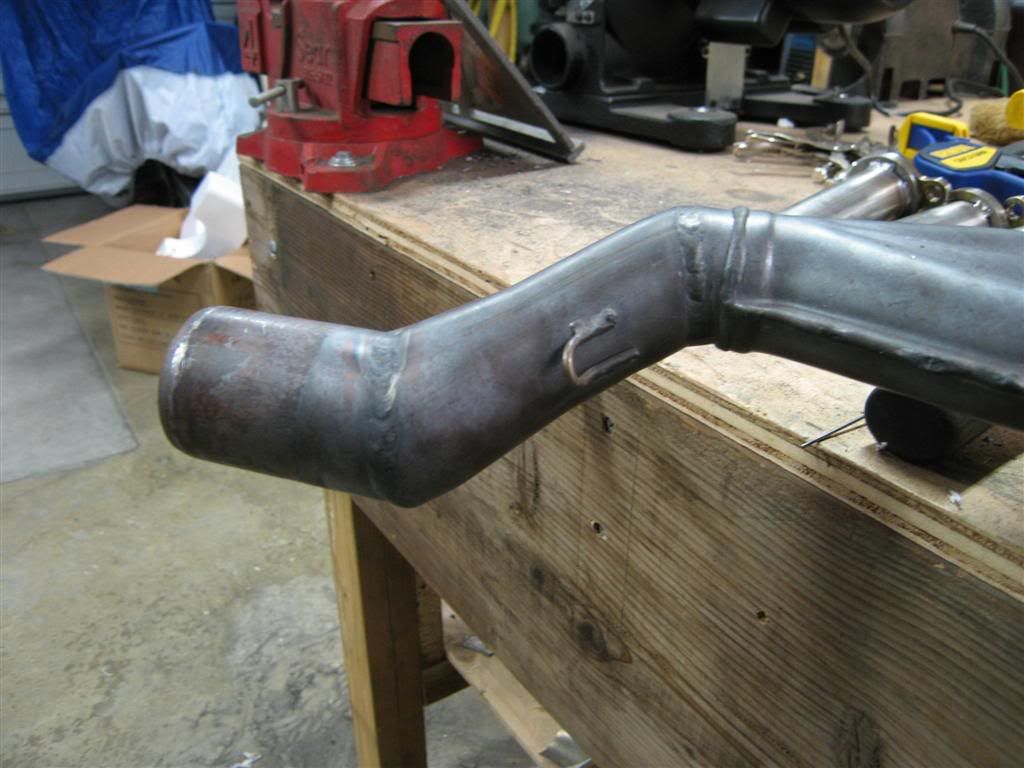
Anyways, here is the beginning of the mess...
IMG_4566.jpg
 
Last edited:

ruffryder

Well-known member
Lifetime Membership
Aug 14, 2002
8,468
1,258
113
I have edited my first post to add more pictures..

As to the design.
I am using 1.5" tubing, 0.065 stainless. I should or could have gone with 0.049 as it would have been lighter, but oh well, it was already bought.

The joint is going to be a slip fit. I went to a muffler shop to get the slip fits made, and they fricken ruined the pipe... They got the slip fit, but crimped the pipe pretty good, so I had to cut sections out of it. That is the reason for all the little sections of tubing that I am using. It was supposed to be only like three sections each runner, but oh well.

I had a friend of mine build me the flanges for the head. They turned out awesome. This was a big hurdle for me, as I was not sure how / where I was going to source these, and I don't have access to the appropriate machinery either, well, it depends upon what you call appropriate.

So stub tubes will be welded to the flanges. I made them about 7" long. They will be bolted to the head, then the slip fit will be on the header and will slide onto the stub tubes. That is how it is supposed to work.

The collector location is based upon the stock location, so I am only changing the tube size. Ideally, I would have like to have access to a program like Lotus_engine_simulation like back at tech, and then I would have been able to optimize my design for increases in the upper rpm band. Right now it feels more like a crap shoot...

I got the collector from cone engineering. They look remarkably similar to ones used by other manufacturers. They are 50 bucks. yah, it sounds like a lot, but if you have never made a collector before, well, they aren't that easy. I didn't want to screw with it. This collector is going to be enough of a challenge as it is.

IMG_4581.jpg


Note if you look inside the stub tubes, you can see where the weld penetrated to the inside of the tube and screwed it up a little. With stainless you need to back purge (put gas on the back side of the weld. I didn't do it here, and you can see the results. I need to purge even for tacking too it seems.

IMG_4586.jpg


IMG_4583.jpg


I think I have most of it figured out. Hopefully I will be able to get the collector done tonight, next couple of days. That is an interesting bugger.

IMG_4590.jpg


IMG_4589.jpg


IMG_4588.jpg


My plan is to tack it all together, then try and install it and see how bad i screwed it up. The exhaust flanges location are based on the exhaust gasket, so they should be dang close to being spot on.

We will see how Murphy likes me though..

I hope you enjoy this!
 
Last edited:

ruffryder

Well-known member
Lifetime Membership
Aug 14, 2002
8,468
1,258
113
I haven't had much time to work on it the last couple of days... but it should be competed this weekend.

On another note, I see that the Aaen header steps to 1.625". Anyone know what the header OD is on the excel muffler?

Since all the header manufactures use the stock flex couplings and stub outs, the Aaen actually steps three times. 1.375" at the head, 1.5" for the 1st section, 1.625" before the collector.

I do know the stock header has a 2" OD outlet on it.

Interesting.
 

MTN_VIPER

Well-known member
Lifetime Membership
Nov 26, 2007
976
436
63
NW WA St.
fourstrokesolutionsllc.com
WOW Ruffy looks like quite a project!
Reminds me of the time I made an intake manfold to mount a supercharger on my V8 powered MGB.
I would put some sort of flexable coupler in there. So your pipe does'nt crack from engine movement/vibration and thermal expansion.
You could use a ball and socket type of joint with springs, like they use on 2 strokers. I believe you can still buy just the ball/socket sections for making pipes.
BTW I measured the primary tubes on my Excell header, they are 1.625" od before the collector.
 

Attachments

  • nytro header.jpg
    nytro header.jpg
    99.6 KB · Views: 132
Last edited:

ruffryder

Well-known member
Lifetime Membership
Aug 14, 2002
8,468
1,258
113
Dang, 1.625 again... well I guess I should have done a little more research. I assume it is 1.5 at the beginning then transitions to 1.625 half way?

Wow, 3 steps for the header. Most motorcycle manufacturers only step 1 time as far as I know.

As to the flexible coupling, the slip fits will allow for a little bit of movement. I am going to try and design the header mount to have some flex in it also. My rear muffler mount will have some flex in it too. From what I have seen, a slip fit is good for about 4 degrees of movement. I think flex couplers are only good for 8 degrees of freedom. Note they do and can move more then that, but the life of the coupler is greatly decreased. It might be a problem, but it might not. I know of another person (the one that made the flanges for me) that did it with a slip fit too. He hasn't had any problems that I know of.

We shall see, maybe I will have to make another one this summer that is bigger OD and includes flex coupler.
 

MTN_VIPER

Well-known member
Lifetime Membership
Nov 26, 2007
976
436
63
NW WA St.
fourstrokesolutionsllc.com
Yes I believe to first section of tube is 1.5", however I didn't measure it there. Just measured the second section because I noticed it was larger then stock and was curious about the size.
I'll bet you'll still see some HP gain with your header. Because of the larger collector and end pipe. Also the straight through design should be an improvement over the modified stock pipe!
Better get busy welding, it's dumping up at Baker:)
 

ruffryder

Well-known member
Lifetime Membership
Aug 14, 2002
8,468
1,258
113
Yes I believe to first section of tube is 1.5", however I didn't measure it there. Just measured the second section because I noticed it was larger then stock and was curious about the size.
I'll bet you'll still see some HP gain with your header. Because of the larger collector and end pipe. Also the straight through design should be an improvement over the modified stock pipe!

One thing that all the aftermarket exhaust do is keep the stock stub tubes, which are only 1.375" The ports on the head I believe are 1.5".... I am not sure what the difference of about 1ft of 1.625" vs. 1.5" will be. Regardless it is too late to stop now.

Maybe I will build another one this summer, maybe dyno the difference if I get really really motivated. ha ha The hard part was the wood frame, the rest is cake... when I am not burning my fingers...

I got a bunch done this weekend. I should have spent a lot more time on it, but oh well.

I got my back purge system setup. Dang what a difference it makes. Nice and clean on the insides of the tube. I can't believe the difference.

Anyways, I have the collector to weld up, and then tack the bends together and go for a test fit. It is coming along pretty well.

IMG_4597.jpg


IMG_4598.jpg


IMG_4599.jpg


IMG_4601.jpg


best weld section
IMG_4601.jpg


some good some bad.. Man, welding tube can be difficult, the changing surface and the fact that I am running my tig standing up with a foot peddle make for interesting times. That big blotch on the middle weld is where my tack weld was. I like making the tacks so they don't penetrate into the surface too much. It makes for easy grinding off if I need to redo something. Though, it makes it look like crap when I melt it down. Oh well, it is a learning experience.
IMG_4603.jpg

I should be an excellent welder by the time I am done. That way I can not weld tube for a couple of years and then learn it all over again!!!
 
Last edited:

ruffryder

Well-known member
Lifetime Membership
Aug 14, 2002
8,468
1,258
113
hmmm... looks like I am on the right track, except for the 1.625" tubing going into the collector...

ty yamaha

No time to finish it up as I am going on vacation tonight..
 

ruffryder

Well-known member
Lifetime Membership
Aug 14, 2002
8,468
1,258
113
Well, I got the exhaust done. It turned out pretty good, considering this is the first one that I have built completely. I designed one a couple of years ago, but we used collectors off of a previous exhaust, and this one was a little more complicated as I couldn't build it in the chassis.

So things I learned.

1) When welding an exhaust together that is using a slip fit only, it is extremely important to think about how the welds effect the metal, shrinking the welded side. Learned that one the hard way, as after I finished welding the collector up, the stupid thing wouldn't fit.

2) back purge back purge back purge... If welding stainless, do it all the time. There is no reason not to. It does make a huge difference in the quality of the weld.

3) Flex couplers are nice for a couple of reasons, most notable the issue with lesson 1.

4) Don't be in a rush when welding stainless.

5) Don't weld the whole dang thing standing up. Tig control is important, and standing up causes you to get tired, and then lesson 4 comes into play.

So, I should have used a large tube for the collector, and flex couplers would have been nice as well, but oh well, it is on and it works.

Here are the pictures.

Getting ready to weld the collector
IMG_4625.jpg


Installed in the sled
IMG_4635.jpg


The top side view.
IMG_4637.jpg


Anyways, it was a cool project. I learned a lot and had some fun doing it. I am going to mount a couple of bends on the end so that the exhaust exits out the side of the tunnel, and maybe a hot dogger in there too. I know it gets hot enough... We shall see what the next couple of weeks brings.
 

ruffryder

Well-known member
Lifetime Membership
Aug 14, 2002
8,468
1,258
113
I figured I would keep going on this project. No sense stopping now! I built an h-pipe thing for the rear muffler output. This will put each of the outlets of the muffler out the side of the tunnel. Hopefully it will make it a little quieter, as the muffler under the tunnel resonates pretty bad. The h part of the pipes is for mounting my hot dogger. I need to build a shield that will go underneath the pipe to keep the snow off of it, and a door on the top to enclose the hot dogger. This will be mounted under my skidoo gas can.

It should all work, I have been thinking about it long enough anyways. Pictures to come soon.
 

ruffryder

Well-known member
Lifetime Membership
Aug 14, 2002
8,468
1,258
113
So finally got time to get to finish the hot dogger mount.

IMG_4979.jpg


mmmm..... hot sandwich!!!
IMG_4980.jpg


It worked out pretty good. I should have flipped the sandwich over, as one side was nice and toasted and the other wasn't. The cheese was completely melted though. Nothing like a hot sandwich to make the riding day go smoother.

The rear cover to keep snow from hitting the hot dogger
IMG_4985.jpg


IMG_4988.jpg


I need to make a better cover. That is what happens after 2 beers, 2 hrs wasted making mounts that wouldn't work, and being 11pm and needing to get loaded up for riding the next day.... after working almost 60 hrs for the week.

The cover has a lot of open spaces on it still. I will probably make some side covers, rivet them in place, then take the whole thing down and make a nice copy.

Interestingly, the cover reduced the amount of snow that sticks in the tunnel. I would have thought the opposite, but that is what happens sometimes.

Funny, this has been an idea ever since I bought the sled... 3 years ago. lol
 
T
Dec 20, 2007
162
18
18
Minturn, CO
The header, as well as the muff pot solution are both awesome. What's the sound level like with the tips protruding from the side of the tunnel, and are they far enough back not to burn your boots when carving, etc.?
 

ruffryder

Well-known member
Lifetime Membership
Aug 14, 2002
8,468
1,258
113
The header, as well as the muff pot solution are both awesome.
thanks

What's the sound level like with the tips protruding from the side of the tunnel,
It is loud, but it is quieter then the AAEN muffler. I am going to be making some inserts to make the outlets smaller OD. Similar to the quite core that the muffler came with for European sales. Not sure how much of an effect it will have. Ideally, the outlets should be pointed to the snow. The loudness is mostly due to the muffler.

The Jardine is one of the louder mufflers out there. I would of liked to use an Akrapovic muffler, as I have found a couple that would be perfect for mounting under the tunnel. Only problem is they are around 700 bucks and the used market for them is non-existent. They are of a much higher quality and are actually quieter as well. Akrapovic does their homework it seems. You just have to pay for it.

are they far enough back not to burn your boots when carving, etc.?
Yes, they are far enough back. Though, they outlets don't stick out enough to touch (they were supposed to..lol) The silencers I am going to make will stick out, and I will be making a little shield or something. Mostly for other passengers and what not.. or when I fall off and get dragged by my sled..lol. Hot stainless will melt stuff FAST.
 

ruffryder

Well-known member
Lifetime Membership
Aug 14, 2002
8,468
1,258
113
i would have dumped the exhaust in the tunnel! nice job though
I originally had it like that. I think the placement of the exhaust, and our very heavy spring snow would clog up the muffler at times. Also, I think there is less snow build up routing the exhaust out the sides.

Plus I think it looks cooler.... lol
 
Premium Features