• Don't miss out on all the fun! Register on our forums to post and have added features! Membership levels include a FREE membership tier.

Better Boards installation

J

jim9006

Active member
Sep 7, 2008
246
44
28
Cle Elum WA
home.comcast.net
Hello All

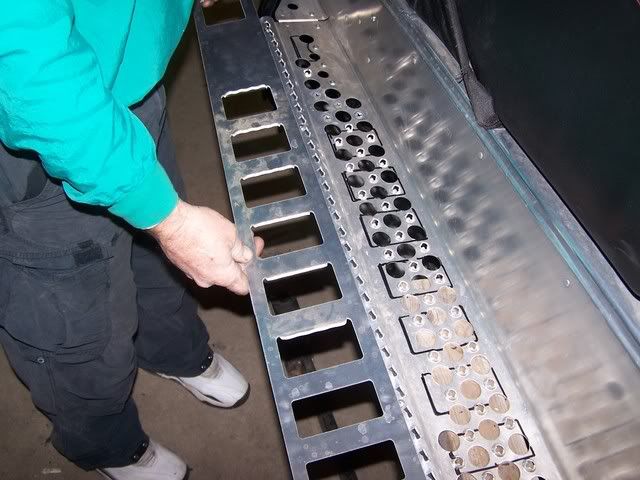
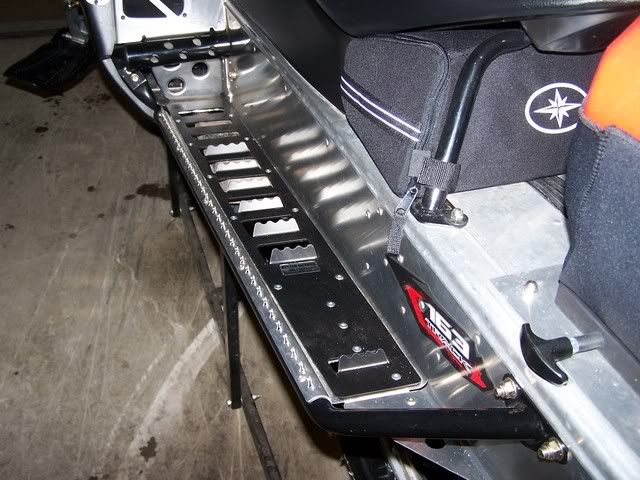
Just got a set of Better Boards for my spanking new 09 D8 and upon marking up my current boards for cutting the realization that I’m removing one heck of a lot material from my $10,000 sleds tunnel.. This will leave a bit less than a ½” of material on each side to attach the Better Boards to. Needless to say fear now has me paralyzed and I just can’t bring myself to do it. No… I not selling my Better Boards. But what I’d really appreciate is for someone who’s done this to post some really good close-up pictures on how it’s supposed to look and where the rivets should be located. The Instructions on the BB website don’t quite do it. I know other have done this. Please post up your experiences and tell me it will be alright!
 
H
Nov 9, 2001
4,253
1,815
113
55
Lincoln Nebraska
Keep in mind the thickness of the board you are replacing the material you are taking out. It will be stronger. I cut each hole out but if I had it to do over I would just take a long cut single hole out rather than clipping each window. Makes a easier edge to clean up and looks better IMO.
 
J

Jkinzer

Well-known member
Nov 27, 2007
2,752
628
113
Lewiston, Idaho
yeah dont be afraid to do it... will make your tunnel actually stronger it looks a lot better and works even better than it looks. if you dont feel comfortable cutting out the whole thing you can just cut out the windows. i have done it both ways but as stated above i believe cutting out the whole peice is the way to go
 
E

EricW

Well-known member
Nov 26, 2007
1,867
691
113
NE Washington
I did what it sounds like you did on the first set I did in 07. I marked and cut each window. Like others have posted I dont leave any cross pieces or center clutter now, straight cuts down the sides. Watch for your drop/reinforce brackets in the rear.

100_4024.jpg


100_4026.jpg


On my 08 I just did the big open cut. Put a rivet at every cross bar on the Boards, I went every other one then re-did it just for added strength. I was 420 Lbs in my Speedo for a year on the 08 Boards, no problems so far. (Big Speedo for sale). lol. EW

100_6846.jpg


100_4537.jpg
 

rmkboxer

Well-known member
Lifetime Membership
Nov 26, 2007
2,598
323
83
46
Bonney lake WA
your best bet if you are going to install them take a sharpy and mark it with the better board on it. then cut it out. I used a small sander and just took off enough to where you couln't see the running board. good luck
 

F-Bomb

SnoWest Paid Sponsor
Premium Member
Nov 26, 2007
2,598
821
113
South West Idaho
www.f-bombracing.com
Fear not my man! 5,000 people went before you! How do you think I felt cutting up the very very first ones years ago? How about when I get to chop up a one off factory demo sled? How about 22 different factory designs with all different installation procedures? It's been a long long road to get to where we are today! Rest assure the system is tried and true as now there are way over a million sled miles standing on Better Boards. I personally have put the saw or plasma to over 100 different sleds...no tunnel replacement screw ups yet!:D 
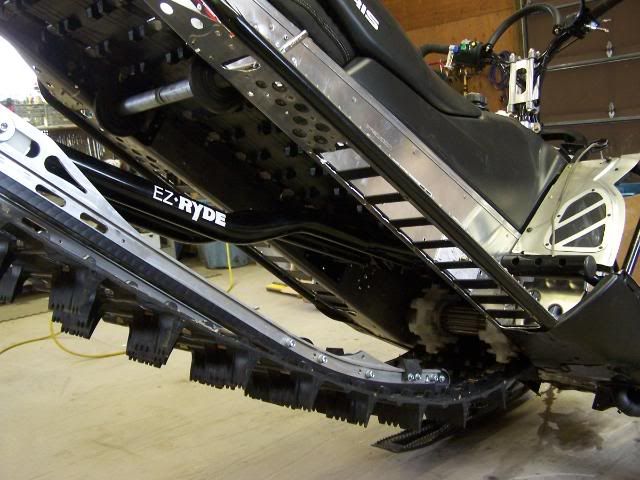
(i'm not the handiest dude on the planet either!)

Lay the boards out as your template and sharpie a cut path entirely around the outer cut path (my hole is an 1/8th" wider then the Better Boards openings. CUT OUT ONE BIG HOLE (don't cut out individual windows in the lead section and then one tiny hole under the rear most cleat behind your rear suspension bracket (also I like to trim a minor bit off of that black bracket so it doesn't show in the hole...make sure not enough to effect that rear rivet hole...don't cut out individual windows it weakens the program in the long run.

Pay attention to having the boards positioned out as opposed to resting on the inside tunnel edge radius. I nice flat rivet surface is what we need so you don't put pulling force on the Better Boards and wow them as soon as you stand on them. If your tunnel edge is away from the boards after you have cut everything out and are ready to drill and rivet adjust the underside up to meet the boards with a mallet. Remember to drill one hole and install one rivet at a time working either forward or back..never one on each end or you can experience metal bunching and have an inferior install. I always put the first front three rivets upside down in the front footwell. Added traction and easier to rivet.

make it look just like this....
Polaris-IQ-RMK-RAW-155-163-side-WEBSITE.jpg


note that the 2010 design has redesigned cleat and evacuation hole positions...now you only need two upside down front rivets plus the one way up front that holds the plastic in place and keeps it all from vibrating.

Enjoy...you bought the best! As always we really appreciate your business!
 
Last edited:

MORSNO

Well-known member
Lifetime Membership
Nov 26, 2007
3,033
1,353
113
Eagle River, Alaska
Jim, Here's a picture from the top side after cutting out the entire area. Use Robs (F-Bomb) pic for optimum rivet layout (I wish I saw this layout a few years ago when I did mine). Notice the 6 rivets in the front where there are no cleats are installed from the bottom providing a little traction. Also the 3 rivets in the rear that go through the idler wheel support and the 2 rivets that tie the tunnel together, you have to drill out the factory rivets to put those 5 in.

DSC_01.jpg
 

F-Bomb

SnoWest Paid Sponsor
Premium Member
Nov 26, 2007
2,598
821
113
South West Idaho
www.f-bombracing.com
Jim,
Yep those in the photo are last seasons version...that sled now also has the same ones that you bought on it. We tested them late in the year and updated the model a bit to make them even stronger yet and offer guys a more balanced front foot platform. You get all kinds of feedback and opinions and unfortunately they are never the same! This years version is generally excellent (of course so was last years or so the 1,000 people that bought them are stating!).

I like to put my very first 2 outer rivets upside down as well as the most front rivet that holds the plastic to the bottom of the foot well. It's hard to get your riveter in that area and it also enhances the traction there but you don't get your foot caught under the hoop bar. Right in the corner where there is plastic meeting the outer extrusion is where I end up with my pressure foot in a lot of riding circumstances. That plastic area is always slick!

MORSNO..excellent photo and that is EXACTLY HOW WE WANT YOU GUYS TO HAVE YOUR CUT OUTS! Perfectly done! On those rear two rivets that hook the support plate I just grind those flat and add two of ours slightly inside. That blind expander rivet is a bugger!
 
G

ghostwhite

Well-known member
Feb 12, 2009
523
186
43
Baghdad, Iraq
Does the same concept apply to the IQ RMK boards? just ordered mine and dread cutting every window with my tool collection...
 

F-Bomb

SnoWest Paid Sponsor
Premium Member
Nov 26, 2007
2,598
821
113
South West Idaho
www.f-bombracing.com
Jim You'll do fine...no problem! Go slow and double check you cut paths...careful on the rivets so they don't slip and bugger up the finish.


Gang I don't cut out the individual windows on any of the installs. The metal that you are removing is micro thin and replacing with SUPER DUPER strong plus way thicker. When you leave the slats they always sag and then you have to connect them with rivets. Messy and more work no structural advantage. Seriously, I personally have cut up and installed at least one of each of our 22 stock models to make sure it's not too horrible for the garage mechanic to undertake. Also note there is almost no damage that you can do that I can't custom make some sort of bandaid to fix. YOU SHOULD SEE SOME THE MESSES THAT WE HAVE PATCHED FOR PEOPLE! It's just a sled and nothing you can do to them cannot be fixed with time and money. Less screwing up...less time and money!

A template just costs everyone more money! Lay em out and use the Better Boards as your pattern. "a cave man could do it"
 
V

Vboost

Member
Nov 26, 2007
241
22
18
NW Montana
I installed some on my 2010 dragon last week, It was really hard taking a body saw to a sled with o miles on it..

SDC10016.jpg
 
Last edited:
J

jim9006

Active member
Sep 7, 2008
246
44
28
Cle Elum WA
home.comcast.net
One down and one to go.... Wow does it look good! I'd have to say after the first one the rest should be easy. I'll post pictures as soon as I can. Right now I go have a beer or 2.
 
Premium Features